Sunday, December 27, 2009

Playing Catch Up

Whew! This month was a doozy, as I'm sure it was for most of you. In the midst of it all, I had the chance to get a little creative with some holiday cards & gifts and also, grabbed my camera to snap a few shots of T in all her creative glory. She really is amazing and quite the budding artist. I can't tell you how happy this makes me! :0)
I held my second Memory Works Class in December. We made Holiday treat bags, gift card holders and mini gift cards. Sherry, Maggie & Allison were a blast to work with and I was excited by their creativity and the personal touches they added to their designs. Here, Sherry & Maggie hold up their treat bag toppers that we later attached to clear cello bags that we filled with a variety of holiday candies & treats.

The red and green cards pictured here were designed for T's teachers. I really enjoyed making these cards. I tried to be a little more relaxed when it came to adding the black ink to give the cards a weathered/distressed look. I dragged the edges of the cards across a black ink pad to give it this look. I really liked how the black contrasted with the vibrant green and red. And to add even more contrast, I decided to add some glitter accents. These are hard to see in these photos, but, trust me, they looked amazing in person.


T's teacher encouraged the children to send in Christmas cards for their classmates. Each child deposited their cards into a pretend mailbox located in their classroom. Then, they were sorted and sent home in these adorable reindeer bags the children had made. T was so excited about the cards I made for her friends. Her teacher said she was very proud of them...naturally, that made me feel wonderful. I LOVE the bright winter colors from this paper set from My Mind's Eye Collection, offered through Memory Works. I added lollipops for an extra sweet holiday treat for the kids.
This Christmas, my father-in-law asked that I design a special wall hanging for our relatives in Ecuador. I used a photo taken at the cemetary of T while paying her Abuela a visit. On this day, T asked that I take a picture of her with her Abuela, as she quickly leaned in and wrapped her arms around her headstone. It was a bittersweet moment, for sure. We all miss Abulea very much and this holiday season was particularly tough for our family. But, creating a special gift which focused on the love T and her Abuela shared, made it a little bit easier.


Our family has a bunch of Christmas traditions... lasagna, fresh Christmas trees, annual ornaments, etc. I love the traditions and family togetherness. For me, it is what makes Christmas so magical. This year, I decided to begn a new tradtion for my nephews. I designed this advent calendar for my sister, in hopes that it would bring her sons much joy as they wait for Jesus' birth and the arrival of Christmas.


I placed a Memory Works order for this project right away! I knew that Basic Grey's "Eskimo Kisses" theme set would look fabulous on all the small boxes. I used Tim Holtz's Crackle Paint (Rock Candy) for the first time on the chipboard letters and LOVED how it came out. I have a feeling this product will be one of my new addictions! It was so easy. Just apply it generously with the brush provided and wait for it to dry! As it dries, it creates a crackle finish. I inked over the crackle to enhance it. I also added a little bling to the design by using Zva's Self adhesive crystals on the three dimensional ornament I created.

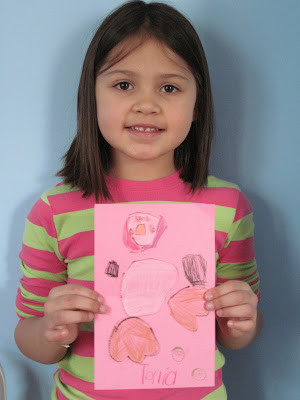
Lately, T has focused her artistic energy on creating penguins. She loves penguins and has toted a stuffed animal named "Penguina" around with her all month. I am so proud that T has the confidence to try to draw new things. She is starting to break things down piece by piece when she draws. In the first photo, T traced Penguina's feet and then drew the rest of her body parts freehand and colored them in. In the next photo, she took Penguina and outlined her body on the Doodleboard and then added all her features independently. She is so proud of her work and her confidence in her ability is growing. She loves sharing her creations with me.

The Blizzard in NY gave me an excuse to lock myself in my studio and get creative... but, of course, I needed a snow break. T LOVED the snow this year. And, while I was combing through the garage trying to find our ice scrapers for the cars, I passed by T's beach toys and had an "aha moment"...I grabbed a few and told T we could make snow castles. She had a blast!

We spent Christmas Eve with my husband's side of the family and I was asked to bring a dessert that the kids would enjoy. I decided to make snowmen cupcakes. I used chocolate chips (turned upside down) for the eyes and mini chocolate chips for the mouth. I took an orange slice candy and cut it into triangles to make a carrot nose. Everyone loved them...even the grown ups!


Friday, December 18, 2009

Countdown to the release of Simple Stories by Memory Works

Trust me... this will change how you scrapbook!


Can't wait to experience scrapbooking, made simple!

Saturday, December 5, 2009

My first Memory Works Class


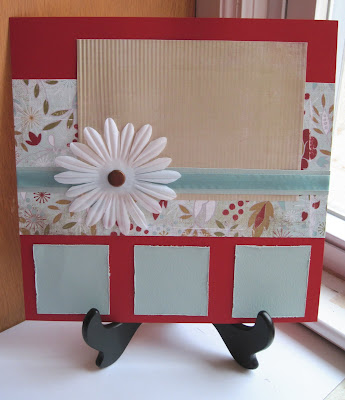
I did it! I held my first Memory Works class last month and it was amazing! I was so excited about my first class, I went all out. I designed three projects: a scrapbook layout, a Fall inspired card and a coordinating refrigerator magnet.

I wanted to make my first class extra special for my first students...so I placed water bottle placecards for each of them at their seats, right next to a package of homemade chocolate covered pretzels (from my mom...thanks Mom!).

By the end of the night, Allison, Angela and Jennifer wound up altering my project designs with their own personal touches and style... I loved it! They weren't afraid to take risks and really got creative. Watching this unfold, was the highlight of the evening for me.

Can't wait for my next class! Hope you'll consider checking it out!

Allison with her take on my scrapbook page design.


Jen is all smiles and happy with her finished project!


Angela can't wait to add pictures of her three kids on her page!


Here are the water bottle placecards I created:


Follow me on facebook or check out my class schedule by visiting Creative Corner Designs.

Thursday, November 19, 2009

Getting Creative with SCENTSY

If you haven't heard of Scentsy, it's time you found out! My best friend Allison recently became a Consultant and after attending a party of hers, I was hooked!

Question: What is Scentsy?

Answer: Wick free, flameless candles, that come in over 80 scents and can be used with over 40 warmers. Safe for children and pets.

Everyone who I've introduced to Scentsy can't get enough! Check it out here!

After hosting a Scentsy party, I earned TONS of free stuff. My favorite item so far... the "Do It Yourself" Scentsy Warmer. Tonight, I got a little creative decorating a warmer for my scrapbooking studio. The colors of the rub-ons matched my room perfectly and it was so easy to do: Cut out the rub-ons you like, position them on the warmer wherever you want and rub them on using the Scentsy rub-on tool. That's it!

Here are some before and after photos! :0)


Simple Stories by Memory Works

Memory Works finally made the big announcement today. Can't wait to find out more about this product line. When I do, of course you will too! Check out this amazing teaser video released today. I can't wait!!!

Sunday, November 15, 2009

November Memory Works Class


I recently became a demonstrator with Memory Works. I will now be hosting monthly classes in my scrapbooking studio in my home. (All classes will be designed with Memory Works products...names you trust: BasicGrey, Cosmo Cricket, We R Memory Keepers, Bo Bunny Press, 7 Gypsies & more!)

You don't have to know how to scrapbook and you may think you are "not creative"...but trust me, these classes are for everyone! I decided to do this because I want to share this hobby with others. I will teach you and you will see how easy it is. PLUS, it is tons of fun!!!

Above the first two photos are for my upcoming class scheduled for:
Friday, Nov 27th at 7:30 pm.
We will be making this greeting card and coordinating refrigerator magnet clip and a single 12x12 layout (just add your own photos!)

5 spots are open for this class.
Cost: $10 and bring your own adhesive; add $1 if you don't have your own adhesive. Beverages and dessert will also be provided!

RSVP by emailing me at jennifer@creativecornerdesigns.com
Questions, call me at 718-614-4864


By the way... the last 2 pics are of projects I created out of my left-over scraps from this class design (felt flowers by Stampin' Up). I just love how they came out. Crafting gone green! :0) Enjoy!

Tuesday, November 10, 2009

Holiday Gifts by Creative Corner Designs

Place your holiday orders now by visiting Creative Corner Designs or emailing jennifer@creativecornerdesigns.com

All items customized with your colors and style in mind!

Take advantage of our EARLY BIRD DISCOUNTS by placing your order by 11-20:
Magnetic Calendars: $5
Wall Hanging: $8
Personalized Paint Buckets: $20

PHOTOS OF ITEMS ARE LOCATED ON THE SIDEBAR TO YOUR right. ENJOY!

Thanks! --Jen

Thursday, November 5, 2009

Onto another creative adventure...


Exciting news! I am now a Memory Works Consultant!

Check it out here!

For the scrapbooking & card making enthusiast:
Now you can order your brand-name scrapbooking supplies through me (Basic Grey, Bo Bunny, We R Memory Keepers and more!)

For someone who is interested in learning how to scrapbook:
Keep your eyes peeled for my upcoming class schedule or book a party in your home. You bring your friends, I'll bring the fun!

Friday, October 16, 2009

"Bunny Online"


Last night, we went to Dave & Buster's as a family and T redeemed some of her tickets for an adorable little bunny that hops, squeaks and wiggles his ears. She named him Snuggles. T quietly began playing in her playroom and after throwing a load of laundry in the machine, I popped in to check on her.


I found her putting the finishing touches on her own paper bunny (which she has since named Daisy). I couldn't get over her creation! She explained that she laid her bunny down on the paper and traced it. Then, she added a circle for his tail and drew in an eye. Then she colored it in. I can't tell you how excited it made me to see her figure out how to do this on her own.


T has really started to show signs of some fantastic creativity...and that added some sunshine to my rainy Fall morning for sure! --Jen
P.S. I asked Talia what I should title this blog entry and she suggested, "Bunny Online". I love it!

Thursday, October 8, 2009

Sharing Creativity


So, like most parents, I have been collecting every piece of artwork T has created since she could hold a crayon, in her once, chubby little fingers. Over the past year, she has really enjoyed coloring and crafting. We started collecting all of these masterpieces in a large basket in her playroom, which began to overflow.


So, I had a thought. Why not share these masterpieces with others? I told T of my plan and she was completely on board. First, we sorted through the basket and saved our most memorable and favorite pieces. I couldn't let go of her first painting of a unicorn and she couldn't let go of anything that resembled a princess, a pony of the color pink. :0) But, by the end of the day, we had gathered 40 masterpieces to share with others.

I made a phone call to a local nursing home and made arrangements for us to visit with the residents. Today, we met with a large group before they had their BINGO game for the day. Talia individually handed out her creations to each of the residents and said, "I made this for you." They loved her...how could they not! And they were very thankful.

Mid-way through our time with the residents, Talia said, "Look Mommy, they are all smiling!" My heart melted and I thought to myself, "Now it can't get any better than that!"
T with one of the residents... she was so cute! I loved her all dressed up with her pearls.


On our way out, I felt so proud of T! I was beaming from ear to ear!


Wednesday, September 30, 2009

Happy as a PIG in mud!


T started Pre-K this year. She and her classmates are learning all about pigs. I wanted to help reinforce her lessons, so we took a trip to the library and found a bunch of pig themed books to read at bedtime.

Later that day, as I was about to walk my empty milk container to the recycling bin in the backyard, it hit me... we could make a pig out of this!!! And so, we did! Talia was completely engrossed in transforming this once white milk container into a pretty little pink friend.

But, about midway through her painting, she stopped and said, "Mommy, I want to make my pig muddy!" In that moment, I felt such pride... 'atta girl! There is that spark of creativity. So, where some moms may have said no to messing up such a pretty project, I let T go to town. And I have to admit, watching her "muddy" her pig (and herself), was the most fun, by far.

Parents, and even teachers, often squash creative ideas because "that is not how it is done" or because it is "too messy" or "because bananas aren't red, they are yellow." I should know, I used to be like them. But now, I make the effort to embrace my daughter's creative thoughts. Today, I hope you all find a way to do something creative with someone you love.


Wednesday, September 23, 2009

A new lease on life

Whew! These past five months have been a doozy! Unfortunately, I suffer from Crohn's disease and have been battling a flare up since January. I had TREMENDOUS back pain and fatigue which was often unpredictable. Good one day, laid up in bed the next...ugh! As you can imagine, this greatly impacted my creativity. :0(


After trials of a variety of medications, I was admitted into the hospital in late August and had surgery. And one month later, I am ecstatic to say that I am feeling great and like I have a new lease on life! I am on the road to recovery and healing at home, surrounded by my family and close friends.


I can't wait to start getting creative again...I've got the itch to create, so keep your eyes peeled for new additions to my blog. For now, here are a few photos of some altered clipboards I made for my nephews on a good day several weeks ago. If you are interested in making one of your own, check out my "how-to" article on Craftbits. Don't forget to leave a comment and give me a rating while you are there. :0)


Wednesday, April 22, 2009

The Melody of Autism

Almost exactly four years ago, I had decided to become a stay at home mom. I was living in the Bronx, with all my friends "over the bridge" and felt really isolated. I quickly knew I had to find some new friends fast. I found a local SAHM group and met Michele, who remains one of my closest friends to this day. Michele and I eventually went on to start our own SAHM group and that is where I met Faith.

Faith is probably one of the most remarkable women I have ever met. She is beautiful, articulate, funny and ambitious. She has decided to homeschool her children and is also raising a son with autism. She does everything with such grace and patience and I really admire her strength of spirit.

Recently, Faith shared with me that she was planning to hold a fundraising event called "The Melody of Autism" which was to celebrate the music and joy
inspired by autism. I knew I
wanted to help. I provided a
Creative Corner Designs gift
certificate as a gate prize and
created a guestbook for the
event. The event was amazing...
inspiring...moving. I found
myself fighting back tears with
each new speaker and each new
performance. The talent that
filled the room was phenomenal
and beyond that, the message
of optimism and faith was one
that I will never forget. It was
a day where everyone stopped
and recognized all the beauty and
blessings that autism has brought
into our lives.

To find out more about Faith and her journey with her family and the Son-Rise program, visit her blogs:


Here are a few video clips from the event. Enjoy!

Saturday, April 11, 2009

Easter Inspired: 2,5,7,10 Boxes & More


Another Easter inspired creation... handmade
"2,5,7,10 Boxes". I couldn't get over how easy
these were to make. Basically, you take one
sheet of 8 1/2" x 11" cardstock and score it at
2", 5", 7" & 10" and cut it and you easily assemble it into an adorable box. They are the perfect size for party favors!


I designed these for a customer for
Easter. They are filled with chocolate Easter Egg
candy. As a special treat, I created scalloped
circles with a handstamped Easter design to cover York Peppermint Patties. I thought this would make it a bit more festive.

As a thank you gift for her business, I added just
a few details to a see-through pail.... white rub-ons from Stampin' Up, some ribbon and patterned scrapbooking paper. I purchased this
pail at A.C. Moore.


My Latest Craft Bits Article: Stamped Candy Bar Wrappers


Just wanted to spread the word about my latest tutorial artcile for Craft Bits...


Check it out here, and don't forget to leave your rating below the article!
Thanks :0)

Thursday, April 9, 2009

Altered Paint Cans

Well, I did it! I just finished my first order for altered paint cans. I had so much fun with this project and I am really pleased with the end result.
My customer requested that I design a creative Easter gift for each of the children in her family. I knew the paint cans would be a great alternative to a typical Easter basket. Each of them is unique and filled with candy and goodies.
My one saving grace during the hours in my scrapbooking studio was my Cricut! I am now even more of a Cricut addict. It made this project so much simpler and cost effective. Special shout out to my amazing hubby for buying it for me for my birthday! :0)

My favorite paint can is Hailey's. I am such a sucker for that shade of blue and I love the contrast with the black and pink.
Brianna's paint can was initially a struggle for me, but I think adding the stars (courtesy of my buddy the Cricut...lol) helped creative a very spirited cheerleading can.